How to Create a High-Converting Landing Page in WordPress

Table of contents
Marketing traffic often fails to convert because standard WordPress pages contain too many navigation links, sidebars, and footer distractions that pull visitors away from the primary call to action. Dedicated landing pages outperform standard website pages by removing these navigation distractions and focusing visitor attention on a single, measurable conversion goal. By stripping away the clutter of a typical site layout, you create a focused environment where the visitor has only one path to take: the one you have carefully designed for them.
This approach allows for tailored messaging that aligns perfectly with the ad or link the visitor just clicked, ensuring that the destination page meets their expectations immediately upon arrival. When the content is hyper-focused, you reduce friction and guide the user toward the desired outcome, whether that is signing up for a newsletter, downloading a resource, or purchasing a product. Building these pages within WordPress requires a strategic shift in how you structure your site, moving away from general-purpose pages toward specialized, high-conversion assets. This guide walks through the technical setup, design best practices, and optimization strategies necessary to build effective landing pages that drive measurable results for your business objectives. By following these steps, you will transform your WordPress site from a collection of standard pages into a powerful engine for lead generation and sales, ensuring that every visitor has a clear, compelling reason to engage with your brand.
Why Dedicated Landing Pages Drive Better Conversions
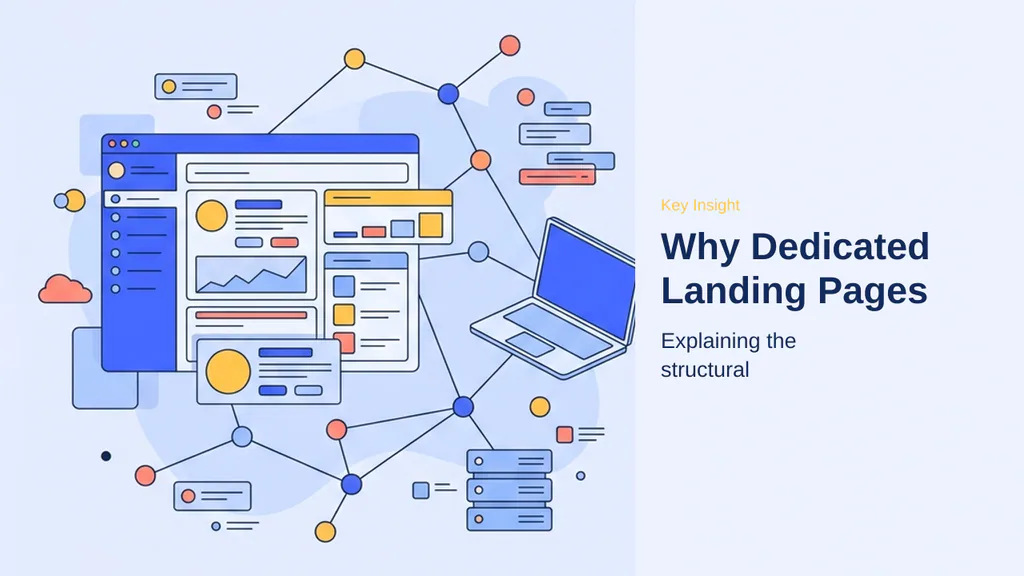
Driving traffic to a WordPress site requires significant effort, from content creation to paid advertising. When visitors arrive, they often leave without taking action because standard website pages contain too many distractions. A typical WordPress page includes navigation menus, sidebars, and footer links that pull the visitor away from the primary goal. Dedicated landing pages solve this by stripping away these elements to focus entirely on a single, measurable conversion objective.
A landing page is a standalone page built around one specific call to action. By removing navigation menus and sidebars, the visitor has only two choices: convert or close the tab. This intense focus is exactly what makes landing pages convert so well. Clear focus can often double the conversion rates typically achieved by standard pages.
Tailored messaging is another critical advantage. Sending paid ad traffic directly to a homepage is often ineffective because the content is too broad. A dedicated landing page allows for messaging that matches the specific expectations set by the ad or link the visitor clicked. When the destination page aligns perfectly with the visitor’s intent, conversion rates increase significantly.
Performance and clarity are also improved through this approach. Landing pages often load faster than standard WordPress themes, providing a frictionless experience on mobile devices. Furthermore, because a landing page has only one job, measuring success is straightforward. Success is defined by a single metric: the conversion rate. This removes the data noise and guesswork associated with broader marketing campaigns, allowing for rapid testing and optimization of headlines, buttons, and layouts.
Beyond structural simplicity, landing pages function as a controlled environment for A/B testing. Because these pages contain less content than standard site pages, you can isolate specific elements—such as headline copy, button colors, or form placement—to determine which variations drive the highest conversion rates. This granular level of control is difficult to achieve on a standard page where global elements like headers and footers remain static across all variations.
Furthermore, landing pages provide cleaner performance metrics. By isolating a single conversion objective, you eliminate the data noise caused by visitors clicking through navigation menus or exploring unrelated site content. This allows for rapid optimization cycles, where you can make data-driven adjustments based on clear, unambiguous conversion signals. When you remove the distractions of a full website, you gain the ability to measure success through a single, reliable metric: the conversion rate.
Installing and Configuring the Page Builder
Building a high-converting landing page requires a reliable tool that handles layout complexity without requiring custom code. SeedProd serves as a drag-and-drop builder that integrates directly into the WordPress dashboard, allowing for the creation of standalone pages that override theme-specific headers and footers. By isolating the landing page from your main theme, you gain total control over the visitor experience, ensuring that navigation menus, sidebars, and footer links do not pull users away from your primary conversion goal.
Choosing the Right SeedProd Plan
SeedProd offers both free and premium versions to accommodate different business needs. The free version provides essential tools for basic layout construction, while premium versions include advanced blocks and a significantly larger library of professionally designed templates. For most users, the premium version is recommended because it provides access to specialized elements like the Optin Form block, which is essential for capturing visitor details effectively.
- Free Version: Ideal for testing the interface and building simple, static landing pages.
- Premium Version: Necessary for accessing the full template gallery and advanced blocks.
- Advanced Blocks: Unlock powerful features like countdown timers and custom opt-in forms.
- Support and Updates: Premium plans ensure access to dedicated support and feature updates.
Verifying Your License Key
Once you have selected and installed the plugin, you must activate your license to unlock the full feature set. Navigate to SeedProd » Settings within your WordPress dashboard. Locate the license key field, paste the key provided in your purchase confirmation email, and click the ‘Verify Key’ button. This step ensures that your installation is authorized and ready to access the template gallery and advanced design features. Proper license verification is the final step before you can begin initializing your first landing page project.
Creating and Naming Your First Landing Page

With the plugin active and your license verified, you are ready to initialize your workspace. The SeedProd dashboard acts as the central hub for managing every landing page on your site, allowing you to create, edit, or duplicate layouts without navigating through standard WordPress post menus. To begin, navigate to SeedProd » Landing Pages and select the button labeled ‘Add New Landing Page’. This screen provides a clear overview of your existing pages, including specialized modes like Coming Soon or Maintenance, ensuring your workflow remains organized as your site grows.
You will be prompted to enter a ‘Page Name’ and a ‘Page URL’. The page name is for your internal reference, so choose a descriptive title that identifies the campaign or offer. The URL slug is the actual web address visitors will see. Concise, keyword-focused URLs perform better in social media and ads, as they are easier to read and share. If you leave the slug field blank, the system will generate one automatically based on your page name, but manually setting a clean slug like ‘free-course’ or ‘spring-sale’ is recommended for better tracking and professional presentation. A well-structured URL helps with both user trust and search engine clarity, making it a critical step before you commit to a design.
When selecting your naming convention, consider the following best practices to maintain a clean and scalable dashboard:
- Use descriptive internal names for easy organization, such as ‘Summer-Sale-2026’ or ‘Newsletter-Signup-Lead-Magnet’.
- Keep URL slugs short, lowercase, and relevant to the specific offer to improve click-through rates.
- Avoid using special characters or excessive numbers in your page URLs to ensure they remain readable.
- Verify your slug matches the campaign intent to ensure consistency across your marketing channels.
- Group similar pages using consistent naming patterns if you plan to run multiple concurrent campaigns.
Once these fields are populated, you are ready to proceed to the template selection phase. This setup ensures your page is correctly indexed and accessible for your upcoming design work. By taking a moment to define these parameters clearly, you prevent confusion later when managing multiple landing pages, allowing you to focus entirely on the creative aspects of your conversion strategy. This structured approach to initialization is the foundation of an efficient, high-performing campaign, ensuring that every page you build is optimized for both the visitor and your internal tracking requirements.
Selecting a High-Converting Template

Choosing the right foundation is critical for maintaining focus and achieving your conversion goals. SeedProd organizes its designs by landing page type, making it easy to find a layout that matches your exact business goal. By selecting a template that aligns with your intent, you eliminate the need for extensive structural modifications, allowing you to focus on refining your copy and call-to-action elements.
Matching Templates to Business Goals
The template gallery is structured to support common marketing workflows. For instance, if your primary objective is to grow your email list, the Lead Squeeze category provides minimalist layouts designed specifically to capture visitor information in exchange for a lead magnet. Similarly, the Sales category offers long-form structures that incorporate dedicated sections for product features, customer testimonials, and pricing tables, which are essential for guiding visitors through a complex purchasing decision.
Other specialized categories include:
- Webinar: Includes dedicated placeholders for event dates, presenter bios, and registration countdowns.
- Coming Soon: Serves as a branded placeholder to build anticipation and collect early sign-ups before a site launch.
- Thank You: Acts as a secondary conversion opportunity by offering related content or exclusive discounts after a primary action is completed.
For those just beginning to build an email list, the Zen Sales Page is a highly effective starting point. Its clean, distraction-free layout provides a balanced structure that is easy to customize while maintaining a professional appearance that builds trust with new visitors.
Previewing Designs Before Selection
Before committing to a layout, it is important to evaluate how the design handles content density and visual hierarchy. Always use the preview feature to inspect how a template manages space, as this ensures the chosen structure supports your specific content requirements without requiring heavy modification. To preview any template, hover over the design and click the magnifying glass icon when it appears. This action opens a full-screen view, allowing you to assess the layout’s flow, typography, and overall aesthetic before you begin the customization process.
Note: While templates provide a significant head start, the most successful landing pages are those that are customized to match your specific brand voice and offer. Do not feel restricted by the initial layout; use the template as a structural guide rather than a final design constraint.
Customizing with the Drag-and-Drop Builder
Once you have selected your template, the SeedProd visual builder provides a dedicated workspace to refine your page. The interface is split into a left-hand control panel and a right-hand live preview, ensuring that every adjustment is immediately visible. Mastering these core components—blocks, sections, and global settings—is essential for maintaining a clean, high-converting layout.
Blocks serve as the fundamental building units of your page. You can drag elements like headlines, images, and buttons directly into the preview area. For lead generation, the Optin Form block is the most critical element, allowing you to capture visitor information without complex configuration. To modify any element, simply select it in the preview to reveal specific customization options in the sidebar, such as color adjustments, font selection, and padding controls.
Sections allow for dropping in pre-built layouts like testimonials, hero areas, or feature columns, which significantly accelerates the design process. Instead of constructing every element from scratch, you can browse the Sections tab to insert professionally designed blocks that align with your page goals. This modular approach ensures that your landing page remains visually consistent while allowing for rapid iteration.
Global settings control master color palettes and fonts, ensuring that your branding remains uniform across the entire page. By clicking the gear icon in the bottom-left corner, you can apply a consistent color scheme or select curated font pairings. Consistent visual branding helps build trust with visitors, which is a key factor in improving conversion rates. Once your layout is refined, you can use the mobile preview toggle to ensure that your design remains functional and accessible on smaller screens, adjusting padding or font sizes where necessary to maintain a frictionless user experience.
Beyond the primary components, the builder allows for granular control over individual elements through the Advanced tab within the sidebar. This area is where you can fine-tune margins, padding, and border styles to ensure your layout breathes correctly on all devices. For those who prefer a specific look, you can also apply custom CSS classes to any block, providing a bridge between the visual interface and more tailored design requirements.
To maintain a professional appearance, consider these best practices when arranging your content:
- Use spacer blocks to create visual breathing room between sections, preventing the page from feeling cluttered.
- Keep your primary call-to-action button above the fold so visitors see it immediately without needing to scroll.
- Group related content—such as a headline, supporting text, and an opt-in form—within a single section to maintain logical flow.
- Limit the number of different font sizes and colors to ensure your branding remains cohesive and readable.
By utilizing these layout controls, you can transform a standard template into a bespoke design that aligns perfectly with your marketing objectives. The ability to toggle visibility for specific elements based on device type further ensures that your page remains optimized for both desktop and mobile users, providing a consistent experience regardless of how your audience accesses your site.
Integrating Lead Capture Forms
Collecting visitor information is the primary function of most landing pages. By utilizing dedicated blocks, you can transform a passive visitor into an active subscriber or lead. Optin forms are essential for gathering contact details, and SeedProd simplifies this process by providing native tools that require no coding knowledge.
Using the Built-in Optin Form Block
The most efficient way to start collecting data is the native Optin Form block. Drag this element from the left-hand panel into your layout to create a functional entry point. Once placed, you can customize the field labels, button text, and success messages to align with your specific campaign goals. This block handles the core logic of capturing names and email addresses, ensuring that your page remains lightweight while focusing on conversion.
Pairing with WPForms for Advanced Needs
When your requirements extend beyond simple email collection—such as needing multi-step forms, file uploads, or complex conditional logic—integrating with a dedicated form builder becomes necessary. SeedProd integrates with WPForms, allowing you to embed custom layouts directly into your page. This combination is particularly effective when you need to capture detailed user information or manage complex lead qualification processes without leaving the page builder environment.
- Use the native Optin Form block for quick, high-conversion email signups.
- Select WPForms for advanced fields like dropdowns, checkboxes, or file uploads.
- Ensure your form success message provides clear next steps for the user.
- Test form submission on both desktop and mobile to verify data capture.
- Map your form fields to your email provider to automate lead routing.
By choosing the right tool for your specific data collection needs, you maintain a balance between page performance and functional depth. Proper form configuration is the final technical hurdle before you can confidently drive traffic to your landing page.
Beyond basic form placement, consider the strategic placement of your opt-in elements to maximize visibility. Primary call-to-action buttons should be positioned above the fold to ensure immediate engagement without requiring the visitor to scroll. Grouping related content, such as a compelling headline followed by a brief benefit list, creates a logical flow that guides the user toward the form.
For those managing multiple campaigns, ensure your form fields are kept to a minimum. Reducing friction by only requesting essential information like a name and email address often leads to higher completion rates. If you require more data, consider using multi-step forms via WPForms to prevent overwhelming the visitor at the initial point of contact.
- Place your most important CTA above the fold for immediate impact.
- Keep form fields minimal to reduce user friction and abandonment.
- Use multi-step forms for complex data collection needs.
- Align your form success message with the next step of your sales funnel.
Ensuring Mobile Responsiveness

With a significant portion of web traffic originating from mobile devices, a landing page that fails to render correctly on smaller screens is a major barrier to conversion. Mobile preview is critical for checking button size and text wrapping, as elements that appear balanced on a desktop monitor often require adjustment to remain functional on a smartphone.
SeedProd simplifies this process by providing a dedicated mobile preview toggle within the builder. By clicking this icon, you can simulate how your page appears to mobile users, allowing you to identify and fix layout issues before they impact your visitors. Device-specific adjustments are essential here, as they allow you to modify padding, font sizes, and element alignment for mobile screens without affecting the desktop version of your page.
When refining your mobile layout, focus on these key areas:
- Button Accessibility: Ensure your primary call-to-action buttons are large enough to be tapped easily with a thumb.
- Text Readability: Adjust font sizes to prevent long headlines from wrapping awkwardly or forcing users to scroll horizontally.
- Spacing and Padding: Reduce excessive margins that may cause content to appear cramped or misaligned on narrow screens.
- Form Usability: Verify that input fields are clearly visible and that the keyboard does not obscure the submit button when active.
By proactively addressing these elements, you ensure a frictionless user experience that keeps visitors focused on your conversion goal regardless of the device they use. This attention to detail is what separates high-performing pages from those that suffer from high bounce rates due to poor mobile accessibility.
Beyond basic layout adjustments, performance optimization remains a critical factor for mobile conversion. Large images and unoptimized scripts often cause slow load times on cellular networks, leading to higher bounce rates. Use compressed image formats and ensure that any third-party tracking scripts are deferred to prioritize the rendering of your primary call-to-action.
Additionally, consider the touch-target size of all interactive elements. Beyond just buttons, ensure that links and navigation elements maintain sufficient padding to prevent accidental clicks. Testing your page on actual mobile hardware, rather than relying solely on the builder’s preview, provides the most accurate assessment of how your design behaves under real-world conditions.
Connecting Email Services and Configuring Settings

With your design finalized, the next phase involves linking your landing page to your marketing infrastructure. This ensures that every visitor who completes your form is automatically added to your mailing list, enabling you to nurture leads effectively. SeedProd supports native integrations with major email marketing providers, including Mailchimp, ConvertKit, and others, which simplifies the data transfer process significantly. By automating this connection, you eliminate the manual work of exporting and importing CSV files, ensuring that your lead nurturing sequences trigger immediately upon submission.
Routing Leads to Email Providers
To begin, navigate to the Connect tab within the SeedProd builder. You will see a list of supported services. Select your specific provider and follow the prompts to authorize the connection, which typically requires an API key or a direct login. Once authenticated, you can map your landing page form to a specific list or tag. This segmentation is essential for tracking campaign performance, as it allows you to distinguish between leads generated from different sources or offers. If your specific provider is not listed, SeedProd also offers a direct integration with Zapier, which acts as a bridge to thousands of other CRM and marketing platforms. This flexibility ensures that no matter your current tech stack, your landing page remains a functional hub for your lead generation efforts.
Configuring SEO and Analytics
The final technical step is ensuring your page is discoverable and measurable. Under the Page Settings tab, use the SEO section to define a clear page title and meta description. These elements directly influence how your page appears in search results and social media previews. For performance monitoring, MonsterInsights connects landing pages to Google Analytics, providing you with direct visibility into visitor behavior and conversion metrics within your WordPress dashboard. By centralizing this data, you can quickly identify which headlines or layouts are driving the highest engagement. Important: Always verify your tracking code by visiting the page in an incognito window to ensure data flows correctly before driving paid traffic. Additionally, the Scripts section allows for the insertion of custom tracking pixels or heatmap tools, providing granular insights into how users interact with your call-to-action buttons. Taking the time to configure these settings correctly transforms your landing page from a static design into a data-driven asset that continuously informs your broader marketing strategy.
Beyond standard email marketing, consider utilizing webhooks for custom data routing if your specific CRM lacks a direct plugin. This approach allows you to send form submission data to any endpoint, providing an extensible solution for complex workflows. When using webhooks, ensure your receiving service is configured to parse the incoming JSON payload correctly to avoid data loss during transmission.
For SEO, prioritize schema markup to help search engines understand your landing page content. While basic meta tags are essential, adding structured data for products or events can enhance your visibility in search results. You can inject this code directly into the Scripts section of your page settings, ensuring it remains isolated from your main site theme. Always validate your schema using official testing tools to confirm that your implementation meets current search engine standards before finalizing your page for public traffic.
Pro Tips for Maximizing Conversions

Once your landing page is live, your work is not finished. To truly maximize your conversion rates, you should implement specialized tools that influence visitor behavior and capture interest from users who might otherwise leave your site without taking action. These strategies focus on building trust and providing secondary opportunities to engage your audience.
Key considerations for Pro Tips for Maximizing Conversions
Social proof acts as a powerful psychological trigger, showing new visitors that others have already engaged with your offer. By displaying real-time notifications of recent sign-ups or purchases, you create a sense of momentum that encourages hesitant users to follow suit. TrustPulse is a primary tool for adding these non-intrusive social proof notifications to your landing page. When visitors see that others are actively participating, it reduces the perceived risk of signing up or making a purchase. This creates a positive feedback loop where the visibility of past conversions directly supports future ones, helping you build a more credible and authoritative online presence.
Practical checks for Pro Tips for Maximizing Conversions
Beyond building trust, you must address the high percentage of visitors who leave without converting. Exit-intent technology is essential here, as it detects when a user is about to abandon the page and triggers a final, targeted offer. OptinMonster uses this technology to catch abandoning visitors, providing a secondary opportunity to capture their interest before they close the tab. This approach is particularly effective because it engages users at the exact moment they have decided to leave, often offering a lead magnet or a time-sensitive discount to change their mind. Regularly monitoring your conversion metrics ensures these tools are effectively driving your goals. By testing different headlines, button colors, and offer types, you can continuously refine your approach and ensure that every visitor has the best possible chance to convert.
- Integrate TrustPulse to display live social proof notifications.
- Deploy OptinMonster to utilize exit-intent technology for abandoning visitors.
- Monitor conversion rates to validate the impact of each optimization.
- Keep offers clear and focused to maintain the landing page’s primary goal.
- Use A/B testing to compare different headlines and call-to-action buttons.
- Ensure that your exit-intent offers provide genuine value to the visitor.
By combining these tools with a clear, distraction-free layout, you create a high-performing environment that consistently turns traffic into leads. Remember that optimization is an ongoing process; even small adjustments to your copy or design can lead to significant improvements in your overall conversion performance over time.
To further amplify your results, consider integrating TrustPulse to display live social proof notifications. This tool creates a sense of urgency by showing recent user activities, which effectively builds credibility with new visitors. Additionally, OptinMonster provides a sophisticated way to recover lost traffic through its exit-intent technology. By detecting when a user is about to leave, it triggers a final, compelling offer that can turn an abandoning visitor into a lead.
Continuous performance monitoring remains the cornerstone of any successful landing page strategy. By tracking how users interact with your content, you can identify specific friction points and refine your approach. Regularly reviewing your conversion metrics allows you to validate the impact of each optimization, ensuring that your efforts are consistently driving your primary business goals. Whether you are testing new headlines or adjusting the placement of your call-to-action buttons, data-driven decisions will always outperform guesswork in the long run.
Frequently Asked Questions

Navigating the technical aspects of page building can occasionally lead to minor roadblocks. Understanding how to address common configuration issues ensures your landing pages remain functional and effective for your marketing goals. When you encounter unexpected behavior, a systematic approach to troubleshooting helps maintain your site’s performance and conversion potential.
Resolving Save Errors
If you encounter issues when saving your work, the cause is often straightforward. Expired login sessions are the most frequent culprit; refreshing your browser tab typically forces a re-authentication, restoring the connection to your database. If the problem persists, caching plugins or security firewalls may be misinterpreting the builder’s data transfers. Temporarily disabling these tools during the design phase often resolves the conflict. In rare cases, a low PHP memory limit on your server may prevent the builder from processing complex layouts, requiring an adjustment from your hosting provider. If you remain stuck, consulting your host’s support team to increase the memory limit is the standard path to resolution.
Landing Pages vs. Regular Pages
Distinguishing between page types is vital for conversion success. A standard WordPress page is designed to keep visitors engaged with your site, typically including global navigation menus, sidebars, and footer links. In contrast, dedicated landing pages are built to remove these distractions entirely. By design, these pages override your theme headers and footers to maintain a singular focus on your call to action. This structural difference is precisely why landing pages are more effective for paid traffic, as they prevent visitors from wandering away before completing the intended conversion goal. When you route traffic from ads or social media, the landing page acts as a focused destination that matches the visitor’s intent, whereas a regular page might dilute that focus with secondary navigation options. Understanding this distinction helps you decide when to deploy a specialized landing page versus a standard site page. While regular pages support your site’s overall navigation, landing pages function as isolated conversion funnels. This separation ensures that your marketing efforts are not undermined by unnecessary links or site-wide elements that pull attention away from your primary objective. By keeping these roles distinct, you maximize the impact of every visitor interaction.
Beyond basic save errors, users occasionally face issues where changes do not appear live. This often stems from server-side caching or browser-level storage that serves an outdated version of your page. Clearing your site’s cache via your hosting dashboard or a dedicated plugin usually forces the server to refresh the page assets. If you are using a content delivery network (CDN), ensure you purge the cache there as well to confirm that the latest version of your landing page is being delivered to your visitors.
When directing traffic to your new page, ensure your permalink settings are configured to allow clean URLs. If your landing page returns a 404 error, navigate to your WordPress settings and re-save your permalinks; this simple action often flushes the rewrite rules and resolves routing conflicts. For those struggling to gain traction, consider using a custom domain or a subdomain to isolate your landing page from your main site’s navigation, which helps maintain the focused conversion funnel you have built.
- Clear site and CDN caches to resolve display issues.
- Re-save WordPress permalinks to fix 404 errors.
- Use subdomains to isolate landing page traffic.
Creating a high-converting landing page is a deliberate process of removing friction and focusing visitor intent. By utilizing a dedicated page builder like SeedProd, you gain the ability to override standard theme headers and footers, creating a clean slate that prioritizes your primary call to action. The transition from general website pages to specialized landing pages is not merely a design choice; it is a strategic necessity for any site owner looking to maximize the return on their marketing efforts. When you align your page content with the specific expectations of your audience, you create a seamless journey that significantly increases the likelihood of conversion.
The technical foundation you build—from selecting the right template to configuring mobile responsiveness and integrating essential email marketing services—is only the beginning. Continuous optimization through social proof, exit-intent technology, and rigorous performance tracking ensures that your landing pages remain effective as your business grows. Remember that the most successful pages are those that are constantly tested and refined based on real visitor behavior. If you encounter technical hurdles, such as save errors or theme conflicts, addressing them promptly ensures that your conversion funnel remains uninterrupted.
Ultimately, the goal is to provide a frictionless experience that respects the visitor’s time while clearly communicating the value of your offer. By maintaining a sharp focus on your conversion goals and leveraging the right tools to support those objectives, you can build a sustainable system for lead capture and sales. Whether you are launching a new product, growing an email list, or promoting a webinar, the principles of clarity, focus, and responsiveness remain the cornerstones of your success. As you move forward, keep your design simple, your messaging clear, and your analytics active to ensure that every landing page you publish contributes meaningfully to your long-term growth and business objectives.